Adding, Removing, Formatting, and Moving Columns in the Log Page Display
Adding a Column
To add column to display an additional item in the Log Page Display, open the Config window's Log tab, and scroll (if necessary) to the bottom row of the table shown in the Log Page Display panel; this bottom row is distinguished by an asterisk in the left-most column:
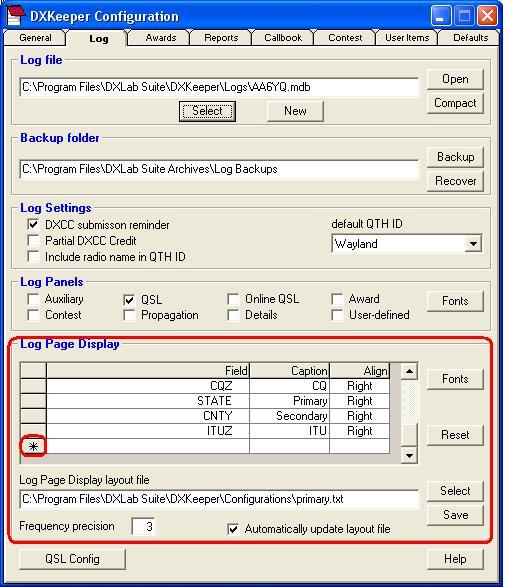
click in the Field cell to the immediate right of the asterisk; a down-facing right triangle will appear on the cell's right border
click the down-facing right triangle, and a list of database field names will appear; click on the field name corresponding to the item you want added to the Log Page Display (a description of all items and their database field names is available here)
click in the Caption cell to the immediate right of the Field cell, and type in the text that you want to appear at the top of the column you're adding to the Log Page Display
click in the Align cell to the immediate right of the Field cell, and choose whether information displayed in this column should be left-aligned or right-aligned
- click in any cell of any other row in the table
view the Log Page Display at the bottom of the Main window's Log QSOs tab to see the column you added.
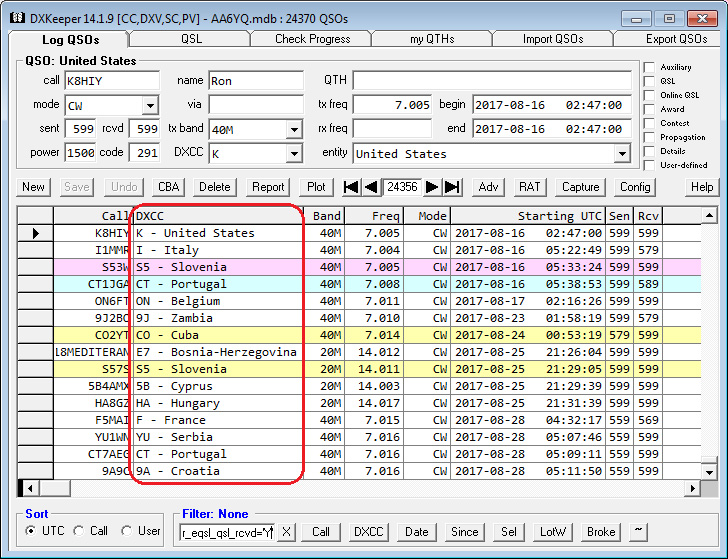
If you want a column that displays each QSO's full DXCC Entity name, then
add a column for the DXCCPrefix item, as described above (if this column isn't already present in the Log Page Display)
on the Configuration window's Log tab, check the Log Page Display panel's Include Entity name with DXCC prefix option box
Removing a Column
To remove a column from the Log Page Display,
open the Configuration window's Log tab,
scroll (if necessary) to the row of the table shown in the Log Page Display panel that describes the column you wish to remove
- click in this row's left-most column (the column that show's an asterisk in the table's last row)
strike your keyboard's Delete key
Changing the Text that Appears as the Top of a Column
open the Configuration window's Log tab,
scroll (if necessary) to the row of the table shown in the Log Page Display panel that describes the column whose caption you wish to modify
change the contents of this row's Caption cell
- click in this row's left-most column (the column that show's an asterisk in the table's last row)
Changing the Alignment of Information that Appears in a Column
open the Configuration window's Log tab,
scroll (if necessary) to the row of the table shown in the Log Page Display panel that describes the column whose alignment you wish to modify
change the contents of this row's Align cell
- click in this row's left-most column (the column that show's an asterisk in the table's last row)
Moving a Column
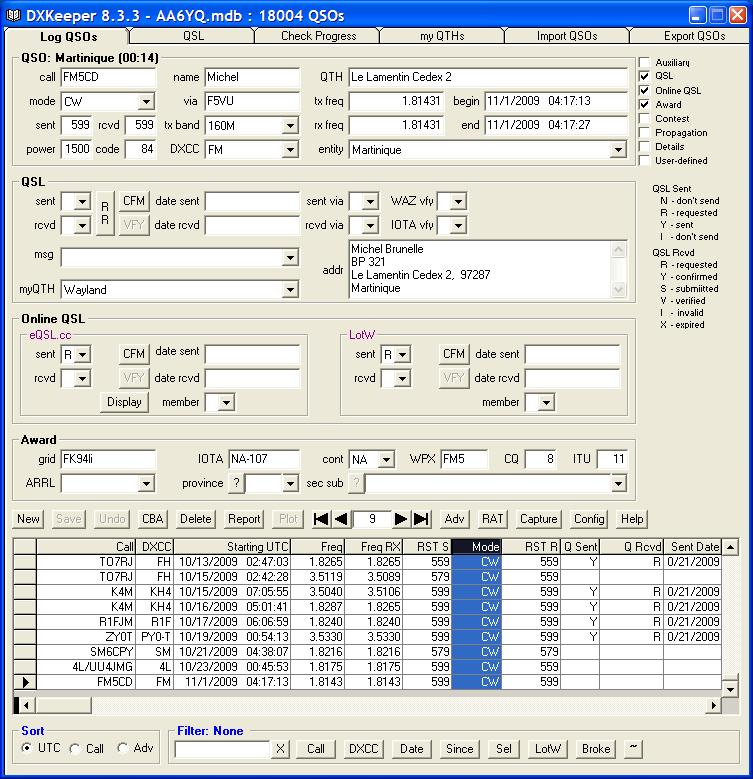
To move a column in the Log Page Display, move the mouse cursor over the caption at the top of the column to be moved -- in this example, the word Mode -- depress the left mouse button, and then release the left mouse button. The entire Mode column will be highlighted:
With the mouse cursor still over the column caption (the word Mode), depress and hold the left mouse button; a pair of red triangles will appear to the left of the column caption:
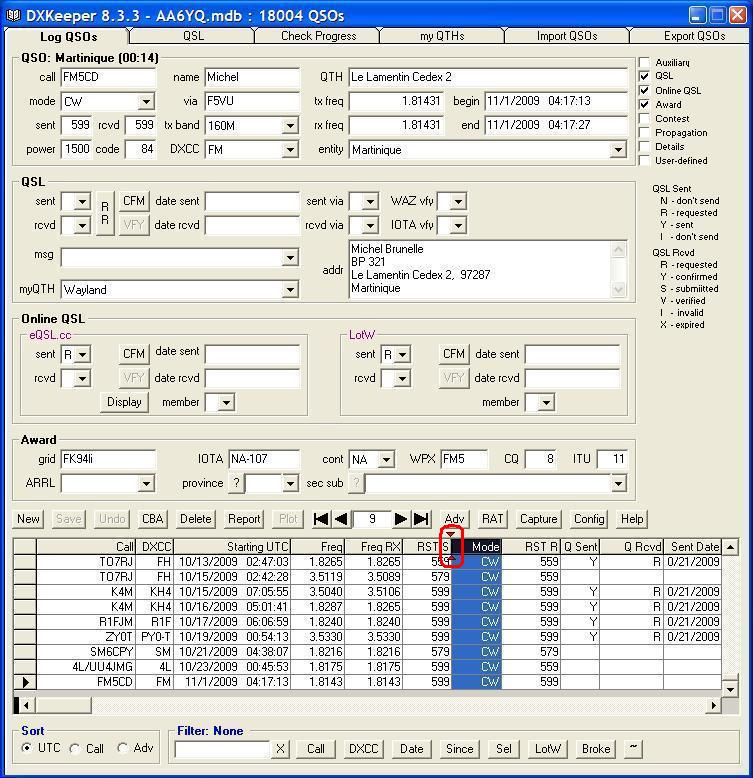
Keeping the left mouse button depressed, drag the mouse cursor to the left or right until the red triangles appear at the desired new location:
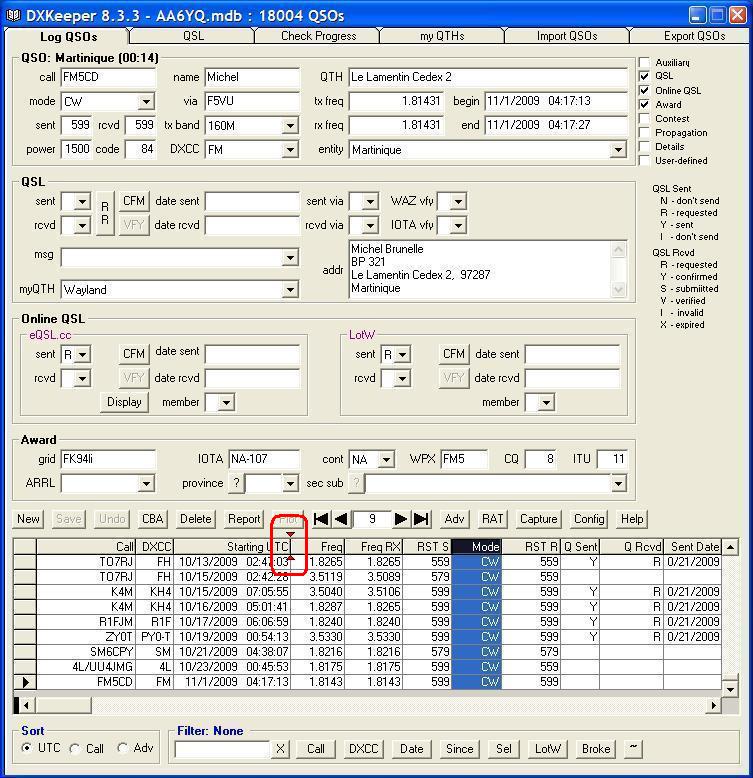
Release the left mouse button, and the selected column will move to the designated new location:
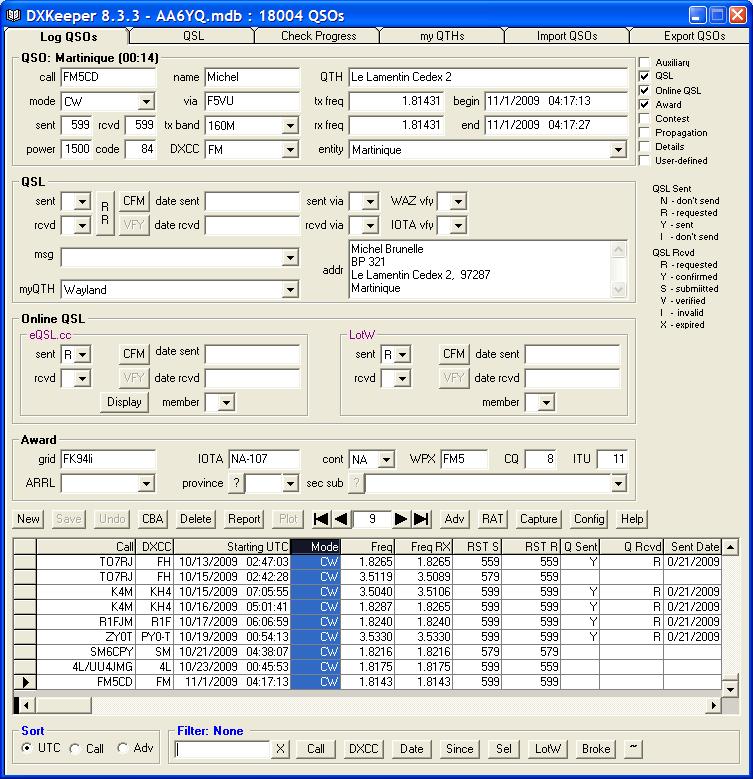
Additional Topics
