Remotely Controlling a Transceiver over the Internet using VSPE
de Rich W3ZJ
Overview
There are a couple of different ways you can accomplish remote station control. One is by installing DXLab on your shack computer and accessing it remotely via a remote desktop application such as TeamViewer or the one built into the Pro versions of Microsoft operating systems. This works reasonably well as long as you have a fast broadband Internet connection both at home and at your remote location. In this configuration, a voice over IP (VOIP) application like Skype can be used to provide remote access to audio for phone and digital mode operation.
A second is by installing the DXLab applications on your portable computer and creating Virtual Serial Ports which act exactly like real serial ports but are actually TCP interfaces to the real ports on your shack computer. Since this method doesn’t require the display of all the graphics on your shack desktop it is less dependent on a high speed Internet connection to work well.
Install the Electrologic Virtual Ports Emulator
First, download a copy of VSPE to be installed on both your shack and remote computers. Note that this is free for 32 bit versions and $24.95 for 64 bit versions. The 32 bit version will work on your 64 bit operating system but it will nag you to purchase the 64 bit license. Follow the installation instructions and install it on both of your computers.
Configure VSPE on your shack computer
- Terminate any DXLab and other applications that access your serial ports.
Start VSPE; the Visual Serial Ports Emulator window will appear:
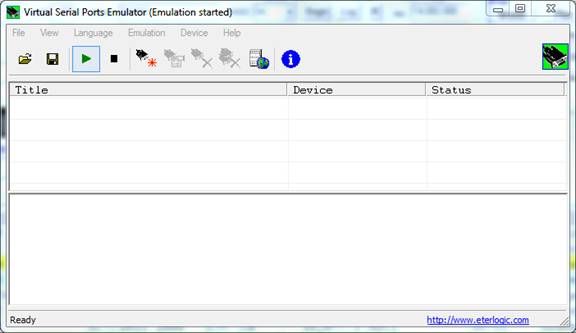
On the menu bar click “Device” and then select “Create…”; the Specify device type window will appear:
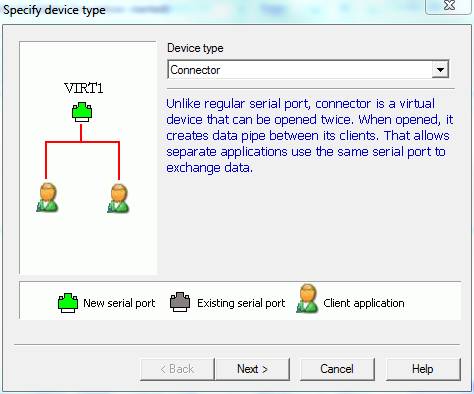
Click on the down arrow on the right side of the Device type selector and select TCPServer:
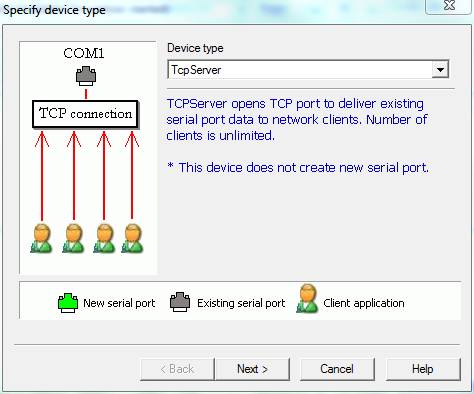
Click the Next > button; the Specify device characteristics window will appear:
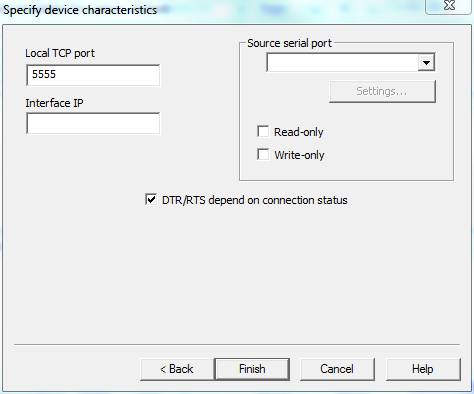
Note that the default Local TCP port defaults to 5555; this is an OK place to start. I use three COM ports. COM1 is connected to my radio, COM2 is connected to my rotor controller and COM4 is actually a USB to serial port converter in my Winkeyer USB. Your set up will probably be different; just keep in mind that you will be setting up a TCP port server for each of the COM devices connected to some piece of apparatus in your shack.
For the first Local TCP port use 5555 as the port number, leave the Interface IP box blank, click the down arrow next to the Source serial port and select the COM port you want to serve to your portable computer. Mine happens to be COM1, which is the COM port to which my radio is connected.
Click the Settings... button and select the proper speed, DTS/RTS, parity, bits and stop bits to match the equivalent parameters of the device connected to the COM port.
Click the Finish button
Repeat steps 5a, 5b, and 5c for each of your serial ports. Increment the Local TCP port each time and select the appropriate COM port for your station apparatus. When you finish, the Visual Serial Ports Emulator window will look like this (with your COM port numbers instead of mine):
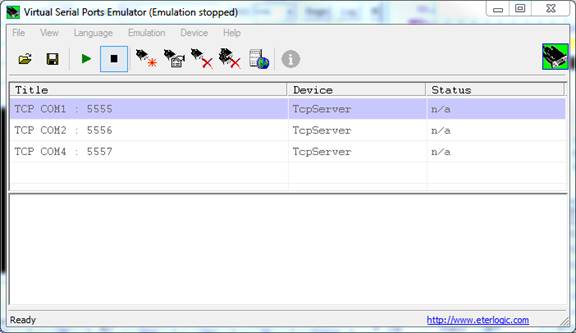
If Ready appears in the Status column instead of n/a, click Emulation in the menu bar and select Stop before proceeding to the next step.
Click File in the menu bar and select Save as…. In the file save dialog, select a convenient folder to save your configuration and give it a name like VSPE-Server. To restart VSPE at a later time, double click on this file in Windows Explorer so that it starts with your configurations. This completes the setup for the server (shack) side.
Configure VSPE on your portable computer
Start VSPE on your portable computer; the Visual Serial Ports Emulator window will appear:

On the menu bar click “Device” and then select “Create…”; the Specify device type window will appear:

Accept the device type of Connector by clicking the Next > button.
Enter the virtual COM port number you want to use and then click the Finish. Note that these do not have to match the COM port numbers on your shack computer but you will later have to configure the DXLab applications to use the appropriate virtual COM port numbers. I started with COM2 because my laptop has a physical COM1 port and I don’t want to conflict with that.
- Repeat steps 2, 3, and 4 above for each of the virtual COM ports you need.
In the Visual Serial Ports Emulator window's menu bar, select Device and then click the Create... button. Set the Device type selector to TCP client and then click the Next > button.
In the Remote TCP host box, if you have a fixed IP address enter that IP address. If you use Dynamic DNS to track changes in your public IP address, as I do, enter the name of your Dynamic DNS host.
In the Remote TCP port box, enter the TCP port number that corresponds with a TCP port that you defined in the server set up above.
In the Source Serial Port box, enter the COM port number that corresponds with the TCP port you entered in the previous step.
Click the Settings button and configure the virtual COM port speed etc. to match the corresponding settings that you defined in the server set up above.
Click the Finish button.
- Repeat steps 6 through 11 for each of the virtual serial ports you are setting up. When you are finished, you should have something similar to this: (Dynamic DNS address altered for security reasons)
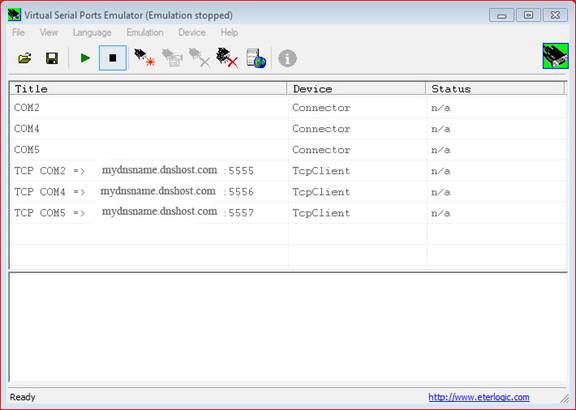
If the status column in says Ready or OK instead of n/a, click Emulation on the Visual Serial Ports Emulator window's menu bar and select Stop before proceeding to the next step.
Click File in the Visual Serial Ports Emulator window's menu bar and select Save as…. In the file save dialog, select a convenient folder to save your configuration and give it a name like VSPE-Client. As with the server side, you will want to start VSPE from this file so that it initializes with your custom configuration. This completes the setup for the client (portable computer) side, but there are some additional things you need to do before you can access your virtual ports over the Internet (outside of your local LAN).
Configure Port Forwarding on your Router
You will need to configure your router to forward the TCP ports you defined above I.E.: 5555, 5556, 5557, etc. to the LAN IP address of your shack computer I.E.: 192.168.?.?. Unfortunately, every router manufacturer has their own idea of menu formats for doing this and some may even call it something other than port forwarding. So, I can’t give you step-by-step instructions for doing this, you will have to consult your router manual.
Configure DXLab and Any Other Applications You May Use
In Commander, configure your Primary CAT Serial Port and, if any, Secondary CAT Serial Port to use the virtual COM port numbers you defined in the client set up above.
If you are using a PTT port, configure WinWarbler to use the virtual PTT COM port you defined in the client set up above.
If you are using rotor control, configure DXView to use the virtual rotor port you defined in the client set up above.
If you are using any third party applications that access serial ports such as pstRotatorAZ, configure those to use the virtual COM port numbers you defined in the client set up above.
Install and configure a sound application such as Skype or IP-Sound to convey the audio from your rig to your portable computer.
Test Your Setup
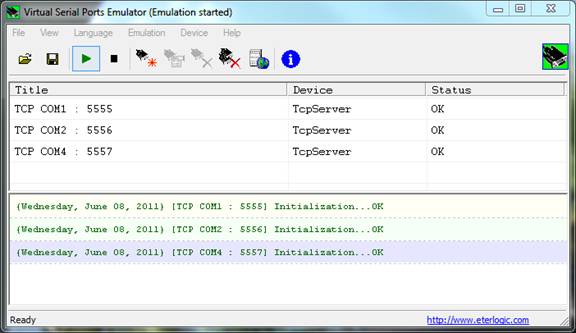
In the VSPE application running on your shack computer, click the green arrow on the tool bar or click Emulation on the menu bar and select Start. The window should now look like this:
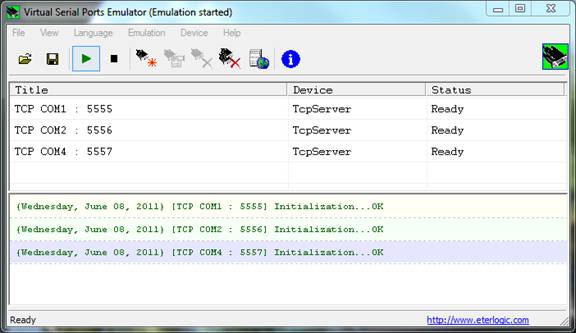
- In the VSPE application running on your portable computer, do the same as step 2 above. The window should now look like this:
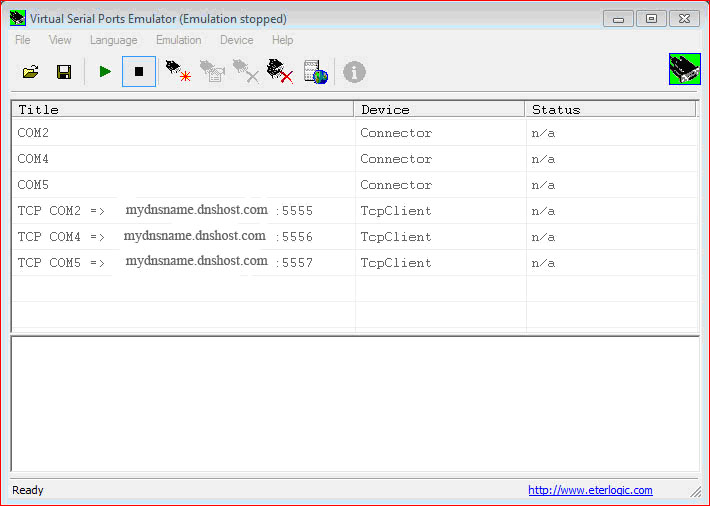
The server (shack) side VSPE window should have also changed to look like this: (Note, the Status has changed from Ready to OK)
- If you see anything in red on either the client or server side, something is wrong; go back and check all of your settings. Assuming all is well, you can now start up DXLab and any other applications you may use for station control on your portable computer and it should all be working the same as it does when you are in your shack.
